Key Takeaways
- Flower pressing is one of the simplest and most rewarding nature study activities you can do at home with children of any age — all you need is a heavy book, some paper, and fresh flowers.
- The best flowers for pressing are flat-faced blooms like pansies, daisies, and violets. Press them within an hour of picking for the best color and shape.
- Flower pressing takes 2-4 weeks with the book method, or just minutes with a microwave press. Both methods work beautifully for nature journals.
- Pairing flower pressing with a nature journal turns a simple craft into a meaningful learning experience that builds observation skills, patience, and a genuine connection to the natural world.
There's something quietly wonderful about watching a child carefully place a wildflower between the pages of a book and then wait — genuinely wait — for nature to do its work. Flower pressing with children is one of those timeless activities that costs almost nothing, requires no special equipment, and yet creates something truly beautiful. It's also one of the most natural entry points into nature study, whether you follow Charlotte Mason, Montessori, or simply want your family to slow down and notice the world around you.
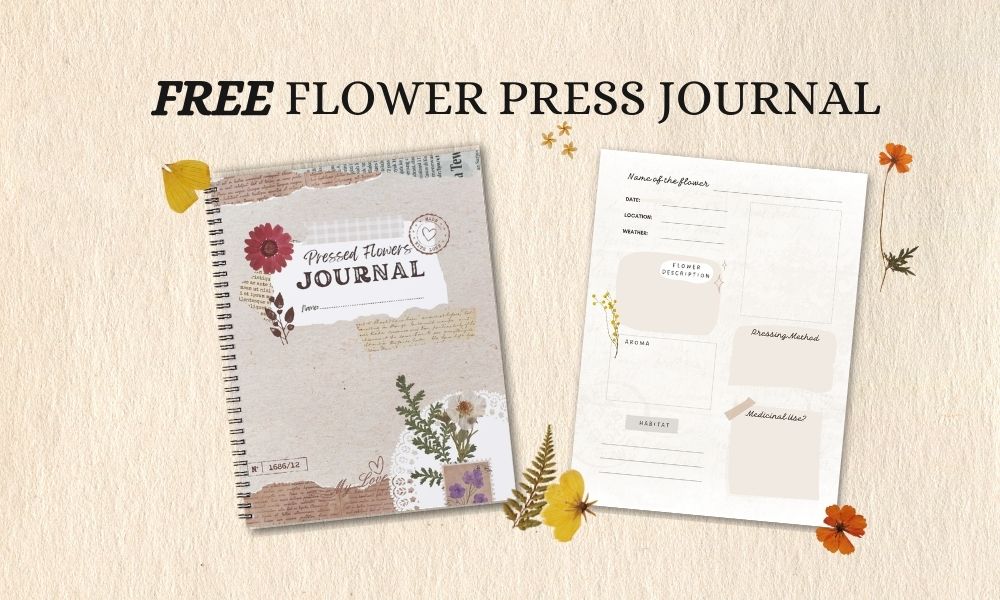
In this guide, you'll find everything you need to start pressing flowers at home with your children — from choosing the right flowers and the best pressing methods to turning your dried blooms into a nature journal your family will treasure. We've also included a free pressed flower journal printable to help you get started right away.
Why Is Flower Pressing a Valuable Nature Study Activity?
Flower pressing teaches children far more than how to flatten a petal. It builds observation skills, patience, and an appreciation for seasonal change — all core goals of nature-based education.
When children collect flowers to press, they naturally start noticing details they'd otherwise walk right past: the way a daisy's petals radiate from the center, how clover leaves fold in the evening, or why some flowers hold their color while others fade. This kind of close observation is exactly what Charlotte Mason called "the science of relations" — learning to see the connections between living things and the world around them.
Flower pressing also introduces practical science concepts without the pressure of a textbook. Children learn about plant anatomy (petals, sepals, stems, pistils), the role of moisture in preservation, and why certain flowers press better than others. For younger children, it's a beautiful introduction to sorting, comparing, and describing what they see. For older children, it becomes a gateway to botanical illustration, plant identification, and field journaling.
And perhaps most importantly, it gets everyone outside. You can't press flowers from a screen.

What Do You Need to Press Flowers at Home?
You need very little to get started — a heavy book, some absorbent paper, and fresh flowers are enough. No special equipment is necessary.
Here's a simple supplies list:
- A heavy book (a thick dictionary or encyclopedia works perfectly)
- Absorbent paper (parchment paper, blotting paper, or even plain white copy paper)
- Fresh flowers and leaves (picked dry, not after rain)
- Something heavy to stack on top (more books, a brick, or a cast iron pan)
- Tweezers (optional, but helpful for handling delicate dried flowers)
- A nature journal to display and document your pressed specimens
That's it. You don't need a wooden flower press, though they're lovely to have. The whole point is showing children that beautiful things can come from simple materials.
If you'd like a ready-made journal designed specifically for pressed flower projects, our free Pressed Flower Journal gives your children a beautiful place to arrange, label, and preserve their pressed flowers. It's a perfect companion for this activity.
How to Press Flowers with Children: Step-by-Step
The simplest and most reliable method is the book press — it's what generations of families have used, and it works beautifully. Here's how to do it from start to finish.
Step 1: Go on a Flower Hunt
Head outside with your children and collect flowers together. Look in your garden, along walking paths, in meadows, or even in a window box. Talk about what you see — the colors, shapes, and sizes of different blooms.
Tip: Pick flowers that are dry (not wet from rain or morning dew). Moisture can cause mold during pressing. If flowers are slightly damp, pat them gently with a paper towel first.
Let children choose their own flowers. Part of the joy is giving them ownership of the process. Even dandelions and clover make wonderful pressed specimens.
Step 2: Choose the Best Flowers for Pressing
Not every flower presses equally well. Flat-faced flowers with thinner petals produce the best results.
Flowers that press beautifully:
- Pansies and violas
- Daisies
- Violets
- Buttercups
- Clover
- Ferns and leaves
- Queen Anne's lace
- Cosmos
- Forget-me-nots
Flowers that are trickier to press (but still worth trying):
- Roses (press individual petals instead of the whole bloom)
- Sunflowers (press smaller varieties or just the petals)
- Thick, fleshy flowers like succulents (they hold too much moisture)
A good rule of thumb: if you can gently flatten the flower between your fingers without it feeling bulky, it will likely press well.
Step 3: Arrange Flowers in the Book
Open your heavy book to the middle section. Lay a sheet of parchment paper or copy paper on the page — this protects the book from moisture and staining.
Place your flowers face-down on the paper in a single layer. Make sure no petals overlap, and leave about an inch of space between each flower. Placing them face-down helps the petals keep their natural shape.
Lay a second sheet of paper on top. Close the book gently.
Step 4: Add Weight and Wait
Stack several more heavy books on top of the closed book, or place a heavy object like a cast iron pan on it. The more evenly distributed the weight, the flatter your flowers will dry.
Now comes the hardest part for children — waiting. Flower pressing takes 2 to 4 weeks for flowers to dry completely. Thinner flowers like pansies may be ready in 10-14 days. Thicker blooms may need the full month.
Tip for impatient children: Check on the flowers together once a week. It becomes a small ritual — a moment to peek inside, observe the changes, and practice patience. This is learning, too.
Step 5: Remove and Use Your Pressed Flowers
After 2-4 weeks, carefully open the book and lift the paper. Use tweezers to gently peel the dried flowers from the page. They'll be delicate, so let children practice a light touch.
Your pressed flowers are now ready for:
- A nature journal or pressed flower journal — arrange and label flowers by name, date, and where they were found
- Bookmarks — laminate pressed flowers between two sheets of clear contact paper
- Greeting cards — glue flowers onto folded cardstock for handmade cards
- Framed art — arrange a collection in a picture frame for nature-inspired wall art
- Nature study pages — use alongside observation drawing and field notes
Can You Press Flowers Without a Book? (Alternative Methods)
Yes, there are several ways to press flowers without using a heavy book. The book method is the simplest, but here are two other approaches that work well for families.
The Microwave Method (Fastest)
If your children are eager to see results quickly, the microwave method dries flowers in minutes instead of weeks.
- Place flowers between two sheets of paper towel
- Set them flat on the microwave turntable
- Place a microwave-safe plate or container on top
- Microwave on high for 25-30 seconds
- Open, release moisture, then continue in 10-second bursts until flowers feel dry and papery
- This method works well for thinner flowers. The results aren't quite as flat as the book method, but children love the near-instant gratification.
The DIY Wooden Press Method
If your family enjoys woodworking projects, building a simple flower press together makes a wonderful hands-on STEM activity. You need two squares of plywood, four bolts with wing nuts, and some cardboard and blotting paper for the inside. Children can even decorate the wood with paint or wood-burning tools.
A wooden press gives more even pressure than books and makes it easy to press multiple batches at once.
How to Turn Pressed Flowers into a Nature Journal
Pressing flowers is a wonderful activity on its own — but pairing it with a nature journal transforms it into something deeper. A pressed flower journal becomes a living record of what's growing in your world, season by season.
Here's how to create one with your children:
-
Start with a dedicated journal. This can be a blank sketchbook, a simple binder with card stock pages, or a printable nature journal. Our free Pressed Flower Journal includes beautifully designed pages for arranging, labeling, and preserving pressed flowers.
-
Arrange pressed flowers on the page. Let children experiment with layouts before gluing anything down. Some prefer neat rows with labels. Others create artistic compositions. Both approaches are equally valuable.
-
Label each specimen. Write (or have children write) the flower name, the date it was picked, and where it was found. Older children can add botanical details — the number of petals, whether it's a perennial or annual, and its growing season.
-
Add field notes and drawings. Encourage children to draw the flower before pressing it, while it's still fresh and three-dimensional. Compare the drawing with the pressed result weeks later. What changed? What stayed the same?
-
Seal with Mod Podge or clear contact paper. A thin layer of Mod Podge (applied with a soft brush) protects pressed flowers and keeps them in place. Clear contact paper works too, and is easier for younger children to handle.
This kind of nature journaling builds skills across multiple subjects — science (observation, classification), art (composition, drawing), writing (descriptive language, labeling), and even geography (where different plants grow). It's the kind of integrated learning that makes homeschooling genuinely rich.
If your family enjoys this type of hands-on nature learning, our Spring Activity Book is packed with 147 pages of seasonal activities for children ages 3-8. It pairs beautifully with flower pressing and outdoor nature study.
What Are the Best Seasons for Flower Pressing?
Spring and summer are the peak seasons for flower pressing, but every season offers something worth preserving.
Starting a pressed flower journal in spring and continuing through the year gives children a tangible way to observe seasonal change. By December, they'll have a full year of botanical treasures to look back on.
Frequently Asked Questions
What are common mistakes in pressing flowers?
The most common mistake is pressing flowers that are still wet or damp, which leads to mold and discoloration. Always pick flowers on a dry day and pat them dry with a paper towel before pressing. Other mistakes include overlapping petals (which causes them to stick together) and checking too often (which disrupts the drying process).
How do you press leaves with children?
Press leaves the same way you press flowers — place them between two sheets of absorbent paper inside a heavy book, add weight on top, and wait 2-4 weeks. Leaves press even more easily than flowers because they're naturally flat. Autumn leaves with bright colors make especially beautiful specimens for nature journals.
How do you make a simple plant press for children?
The easiest plant press for children is a heavy book with parchment paper inside. For a more dedicated press, sandwich flowers between two pieces of thick cardboard held together with rubber bands. If you want a reusable wooden press, use two squares of plywood with bolts and wing nuts at each corner, layering cardboard and blotting paper inside.
What can you use instead of parchment paper for pressing flowers?
You can use plain white copy paper, blotting paper, coffee filters, tissue paper, or even paper towels. The key is using absorbent, uncoated paper that will wick moisture away from the flowers as they dry. Avoid wax paper or glossy magazine pages — they trap moisture and can cause mold.
How long does it take to press flowers?
Most flowers take 2 to 4 weeks to dry completely using the book method. Thin, flat flowers like pansies and violets may be ready in about 10 days. Thicker flowers can take up to a month. You'll know they're ready when they feel completely dry and papery to the touch, with no remaining flexibility.
Start Pressing Flowers with Your Children This Season
Flower pressing is one of those beautiful, unhurried activities that reminds us why hands-on learning matters. It doesn't require a curriculum, a lesson plan, or expensive supplies. Just flowers, a book, and the willingness to wait.
Whether you're a seasoned nature study family or you're just looking for a simple spring activity to try with your children, pressing flowers is a wonderful place to begin. Grab our free Pressed Flower Journal to give your family a beautiful starting point — and if you're looking for more hands-on spring learning, our Spring Activity Book has 147 pages of nature-inspired activities for children ages 3-8.
Go outside. Pick something beautiful. And press it.